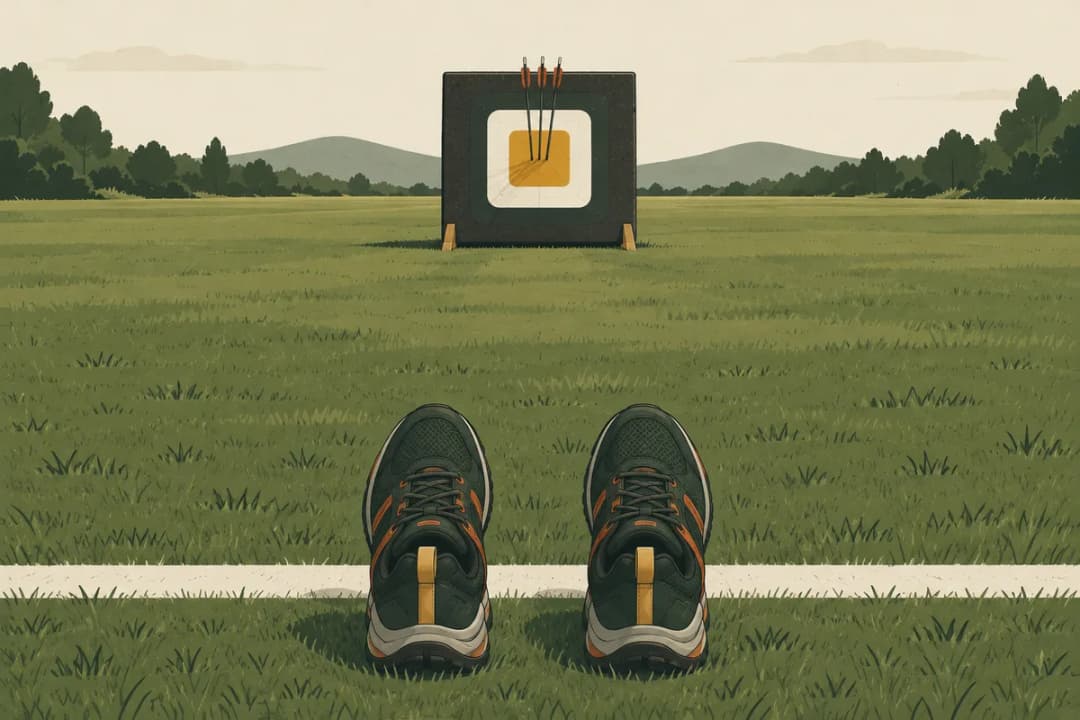


- Start with a square stance: feet shoulder-width apart, one on each side of the shooting line, toes pointing at the target.
- Repeatability beats style: a stance you copy every shot tightens groups more than a “perfect” stance that changes.
- Keep roughly 60% of your weight on the balls of your feet and your knees relaxed, not jammed back.
- Stack your shoulders over your hips in a T-form, so bow hand, shoulders and draw elbow make one line.
- Mark your feet with chalk, tape or tees so you step into the same spot every end.
Your release feels clean, but your arrows still spray left and right across the target, and often the problem starts at your feet, not your fingers. 🤔
The fix: stand square, feet shoulder-width apart and straddling the shooting line, weight slightly forward, with your feet in exactly the same place for every shot. Get that right and your groups shrink before you change any gear; if they don’t, check your bow’s weight with the draw weight calculator. 👇
Why your archery stance changes your groups
Your stance is the base every other step of the shot sits on. If your feet move between shots, your hips and shoulders move with them, and the arrow follows your body, not your aim.
The National Archery in the Schools Program (NASP) lists stance as step 1 of its 11 Steps to Archery Success, ahead of nocking, drawing, anchoring and aiming. That order makes sense: you can’t repeat an anchor or a release if the platform under it keeps changing.
Stance works the same way on a recurve, a longbow or a compound. If you’re brand new, my recurve archery for beginners guide walks through the whole shot, from stance to follow-through.

// Free printable
Get the range log I actually use.
Seventeen printable pages: session log, score tracker, a 30-day drill challenge, a bow maintenance card, a first-season checklist and more. Join the monthly email and it lands right away.
Square stance basics: the best archery stance for beginners
Start with a square stance. Your feet sit about shoulder-width apart, one on each side of the shooting line, and a line drawn across your toes points straight at the center of the target.
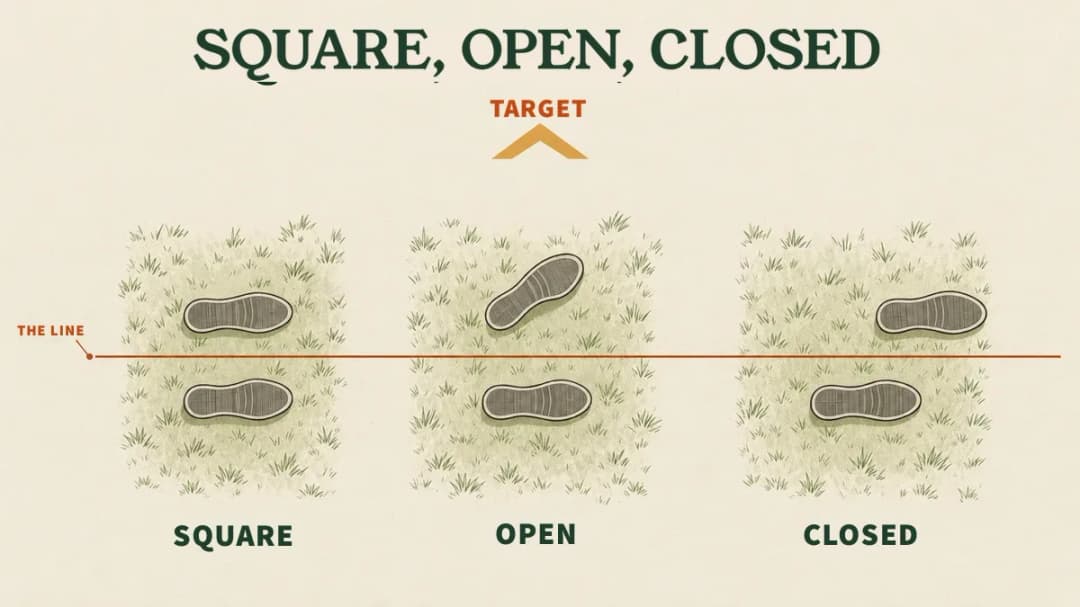
Coaches usually start beginners here because it’s the easiest stance to learn and repeat. Open and closed stances exist for good reasons, but a square stance gives you one simple reference you can check in a second.
The coach behind Online Archery Academy, whose video sits under the table below, starts by busting a myth and then gives the same advice:
There is not one stance that suits everyone… If you are a beginner, we do recommend that you start with the square stance, and this might not be the stance that you shoot with for your entire career, but it’s a great starting point.
I like that the video says it out loud: square is where you start, not a rule for life. Shoot it until your groups settle, and only then try opening up a little if the string keeps brushing your chest or arm.
| Stance | Where your feet go | Main benefit | Main drawback | Who it suits |
|---|---|---|---|---|
| Square | Toes on a line pointing at the target, feet shoulder-width apart | Easiest to learn and repeat | The string passes closer to your chest and bow arm | Beginners and most recreational archers |
| Open | Front foot drawn back and turned toward the target, often about 30° | More string clearance past the chest and bow arm | Harder to repeat; your hips have to stay open through the draw | Target archers with steady form, or anyone fighting string slap |
| Closed | Front foot ahead of the line, body turned slightly away from the target | Some archers find shoulder alignment feels natural | Moves your bow shoulder into the string’s path | Rarely taught to beginners |
How to set up your archery stance in 5 steps
This sequence follows the NASP method, written for a right-handed archer (bow in the left hand, string in the right). Left-handed? Swap every left and right.
- Straddle the line. Stand with your feet together behind the shooting line, then step so one foot is on each side of it, left foot on the target side.
- Set the width. Slide your front foot toward the target until your feet are about shoulder-width apart.
- Check the line. Lay an arrow across your toes: it should point at the center of the target.
- Shift your weight forward. Put a little more weight on the balls of your feet than on your heels, and keep your knees firm but not jammed back.
- Stand tall. Hips under shoulders, chest relaxed, head up and turned toward the target.
NASP’s own version turns the front toe slightly toward the target (10 o’clock for a right-hander), which opens the stance a touch. Either works, as long as you do it the same way every time.
Weight and balance: where your body weight should sit
Keep your weight slightly forward, on the balls of your feet rather than your heels. Coaching guides commonly suggest about a 60/40 split, because a heel-heavy stance tips you back as the bow comes up. Quick check: if you can lift your toes without wobbling, too much weight is on your heels.
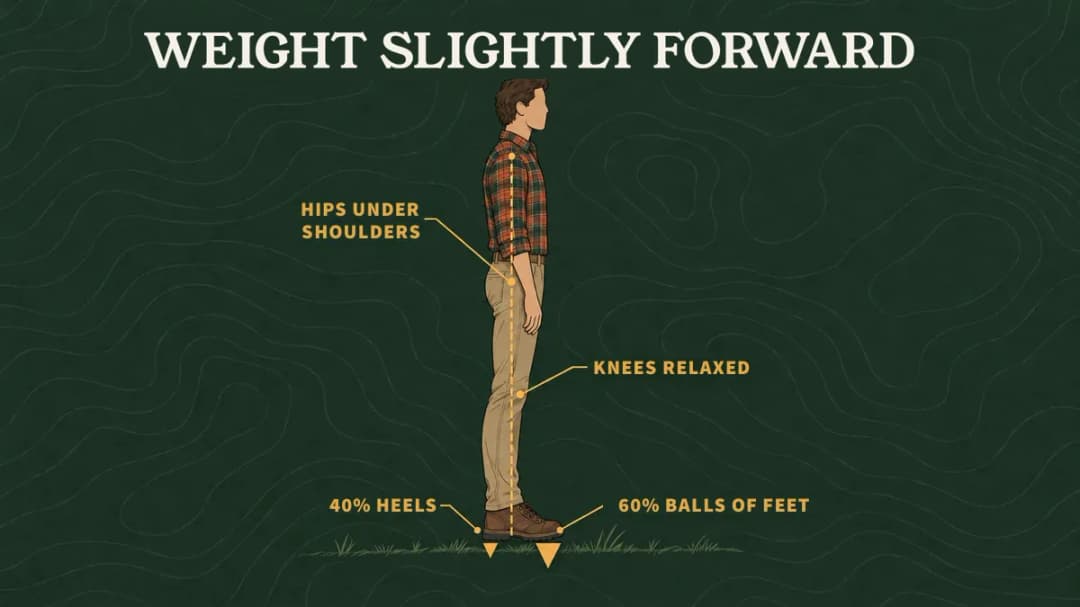
Keep your knees firm but relaxed, never jammed back: NASP teaches “firm” knees, and a slight flex is fine if it keeps you still. Knees forced back tire you faster and make small balance corrections harder, and that shows up as a wobbling point at full draw.
- Too narrow: feet close together make you sway at full draw.
- Too wide: a very wide stance locks your hips and makes it hard to settle.
- Just right: feet under your hips and shoulders, so you can stand still without effort.
T-form posture: how your stance carries up to your shoulders
Your feet set your hips, and your hips set your shoulders. At full draw, your bow hand, both shoulders and your draw elbow should make one straight line, the shape coaches call the T-form.
That’s a mistake I made for a long time before I noticed it. I wasn’t standing in a proper T, on top of not pulling all the way to my cheek, and both cost me shots.
I was also not standing properly, like proper T-form pose to shoot.
If your front shoulder creeps up or toward the string, check your feet first. A front foot that drifts ahead of the line drags your hip and shoulder with it, and the string ends up closer to your arm.
The same video has a warning for anyone who thinks a square stance does the work for them:
Because there is a lot of the positioning of the alignment already done, it can be a little bit easy to become lazy… you still have to do the alignment, you still have to engage the core, and you still have to make sure that you’re coming into full draw properly.
That’s the same lesson as my T-form mistake above. A square stance only sets you up; you still build the T on every shot: feet, then hips, then shoulders, then the draw.
Make your stance repeatable with foot markers
Repeating your stance matters more than which stance you pick. Once you find a position that feels balanced at full draw, mark it so you can step straight back into it every end.
- Chalk or tape on a range floor or a concrete pad.
- Golf tees pushed into the grass at your toes on a backyard range.
- A traced cardboard footprint you carry to the range, a trick some coaches use with students.
- A phone video from behind, so you can compare your stance week to week.
Find your natural point of aim and fix left-right misses
Your body has a direction it wants to point at full draw, and your stance decides it. Bowhunting coaches use a simple test: draw on the target, close your eyes for a few seconds, then open them and see where your aim drifted.
| Where your aim drifts (right-handed archer) | Move your front foot | What it does |
|---|---|---|
| Left of the target | Toward the shooting line | Squares the stance and turns your body right |
| Right of the target | Away from the shooting line | Opens the stance and turns your body left |
| Stays on the target | Leave it | Your stance already matches your aim; mark it |
Left-handed archers reverse the table. Repeat the test until your aim stays put, then mark your feet so you can find that spot again.
Stance and draw weight: when your feet aren’t the problem
If you can’t hold steady no matter where your feet go, the bow may be too heavy. A draw weight you can’t hold for a few seconds pulls your whole posture out of shape, and no stance fixes that.
Check yours with the draw weight calculator and the draw length calculator. If you’re still shopping, my guide on how to choose a recurve bow covers what weight to start with.
Mismatched arrows can also look like a form problem. If yours fly sideways off the bow, read carbon vs aluminum arrows before you rebuild your stance, and look up any new term in the archery glossary.
// FAQ
Frequently asked questions
Quick answers to the questions readers ask most.
What is the correct stance in archery?
For beginners, a square stance: feet about shoulder-width apart, one on each side of the shooting line, toes pointing at the target. Once your form is steady, you can try a slightly open stance.
How far apart should your feet be in archery?
About shoulder-width apart, with your feet under your hips. Too narrow and you sway; too wide and your hips lock up.
Which foot goes forward in archery?
The foot on your bow-hand side goes on the target side of the shooting line. For a right-handed archer holding the bow in the left hand, that’s the left foot.
Is an open stance better than a square stance?
Not for most beginners. An open stance gives the string more room past your chest and arm, but it’s harder to repeat, so start square and open up only if a coach suggests it or the string keeps hitting you.
Should your knees be bent when shooting a bow?
Straight but relaxed: firm, as NASP teaches, never jammed back and never deeply bent. A slight flex is fine if it helps you stand still without moving your feet.
Does stance matter for a compound bow?
Yes. The same square or slightly open stance, forward weight and T-form posture apply to compounds, recurves and longbows.
Final thoughts
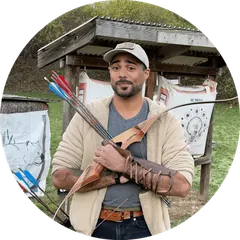
A good archery stance is boring on purpose: feet shoulder-width apart, straddling the line, weight slightly forward, and the same spot every shot. Get that right and every other step of the shot has something solid to stand on.
Mark your feet next time you shoot, run the eyes-closed test, and watch what happens to your groups. Logging each session in my free range log makes it easy to see the change from one week to the next.
